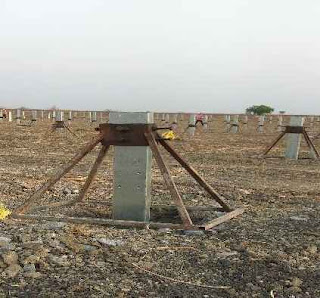
This guide is a set of step-by-step instructions to help workers carry out routine operations for piling works in solar farms.
This guide as a part of solar panel installation guide aims to achieve efficiency, quality output and uniformity of performance, while reducing miscommunication and failure to comply with industry regulations.
Piling Definition
Piling is a type of foundations, used to support solar panels on piles. This foundation type is green, economical, and efficient. Vertical columns of steel are driven deep into the ground to give more support to the solar panels that sit on top.
Tools Used for Piling
1. Pile Driver Machine
A pile driver is a device used to drive piles (poles) into soil to provide foundation support for solar panels mounting structures. it usually comes with hammering and drilling capability.
 |
| Pile Driver Machine |
2. Inclinometer
Inclinometer, also called tilt sensor, measure the slope or angle of piles or posts based on gravity.
 |
| Inclinometer |
3. Measuring Tape
Measuring tape is a flexible ruler used to measure distance. It consists of a ribbon of cloth, plastic, fiber glass, or metal strip with linear-measurement markings. It is a common measuring tool.
 |
| Measuring Tape |
4. Concrete Mixer Truck
A concrete mixer truck is a device that homogeneously combines cement, aggregate such as sand or gravel, and water to form concrete and transfer it from place to place.
 |
| Concrete Mixer Truck |
5. Pile Spacer
Pile Spacer is a guide and alignment tool for lateral positioning and centralization of solar panels piles.
 |
| Pile Spacer |
6. Torque Wrench
A torque wrench is a tool used to apply a specific torque to a nut or bolt. It is usually in the form of a socket wrench with special internal mechanisms.
 |
| Torque Wrench |
7. Total Station
A total Station is an electronic optical instrument used for Land surveying, angle measurement, distance measurements, and coordinate measurements. Total Stations can be remotely controlled and are mounted on Surveying Tripods.
Piling Procedures
After doing the necessary grubbing (clearing denotes the removal of trees, shrubs, stumps, and rubbish from a site) and grading ( ensuring a level base, or one with a specified slope) as per the drawings, the following works can be done.
1. Peg Marking
 |
| Peg Marking Works |
Use total Station to place the peg marks in the right places according drawings.
2. Boring
 |
| Boring Works |
PS: We don't need to bore in all cases, just to enhance the soil by concreting. and this issue can be identified by pullout tests which made only by geological specialists.
Piling Works Procedures
a. Bore holes with pile driver / drilling machine as per drawings and site conditions.
b. Position of pile driver / drilling machine must be checked before drilling and drilling must be done exactly on its position marked by Surveyor by ensuring the verticality of drilling boom.
c. To avoid the movement of drilling machine during drilling anchoring must be done.
d. Verticality of boom is ensured by installing a spirit level and during drilling make sure that the bubble in spirit level is in center position , so the bore holes are driven vertically.
e. After positioning of the pile driver / drilling machine remove the nails which was used for peg marking before drilling.
f. Verticality of bore holes should be checked accurately using spirit levels to ensure that the bore is driven exactly vertically downwards, so that alignment of vertical post can be done properly.
3. Pile Placing
a. Prepare and place the reinforcement steel cage in the hole as per drawings.
b. Place the post (pile) in the hole by using post placer.
c. adjust the height of the post above the ground as per drawing.
d. adjust the slope (vertical - (90) degrees) of the post by using Inclinometer Tool.
d. adjust the slope (vertical - (90) degrees) of the post by using Inclinometer Tool.
e. Make sure that the center of gravity of vertical post lies exactly on center of the hole.
f. Mark the first adjusted 4 posts with “OK” mark and the intermediate posts shall be centered an aligned by using piano steel wire and measuring tape.
g. Adjust the distance between posts by measuring tape as per drawings with tolerance (Max ±2mm).
f. Mark the first adjusted 4 posts with “OK” mark and the intermediate posts shall be centered an aligned by using piano steel wire and measuring tape.
g. Adjust the distance between posts by measuring tape as per drawings with tolerance (Max ±2mm).
4. Concreting
a. Make sure that the post placer not be moved during concreting.
b. Use the concrete truck to bring the concrete to the site.
c. Use the chute to ensure slow and steady flow of concrete.
d. Compact the concrete by compacting rod after the concrete is poured in the bore.
e. Clean any excess concrete deposited on the post with wet cloth.
c. Use the chute to ensure slow and steady flow of concrete.
d. Compact the concrete by compacting rod after the concrete is poured in the bore.
e. Clean any excess concrete deposited on the post with wet cloth.
f. Check the distance between the post after concreting and If any change in distance is observed it must be rectified instantly.
g. Don't remove any concrete form before hardening of concrete (Min 6 hrs).
g. Don't remove any concrete form before hardening of concrete (Min 6 hrs).


